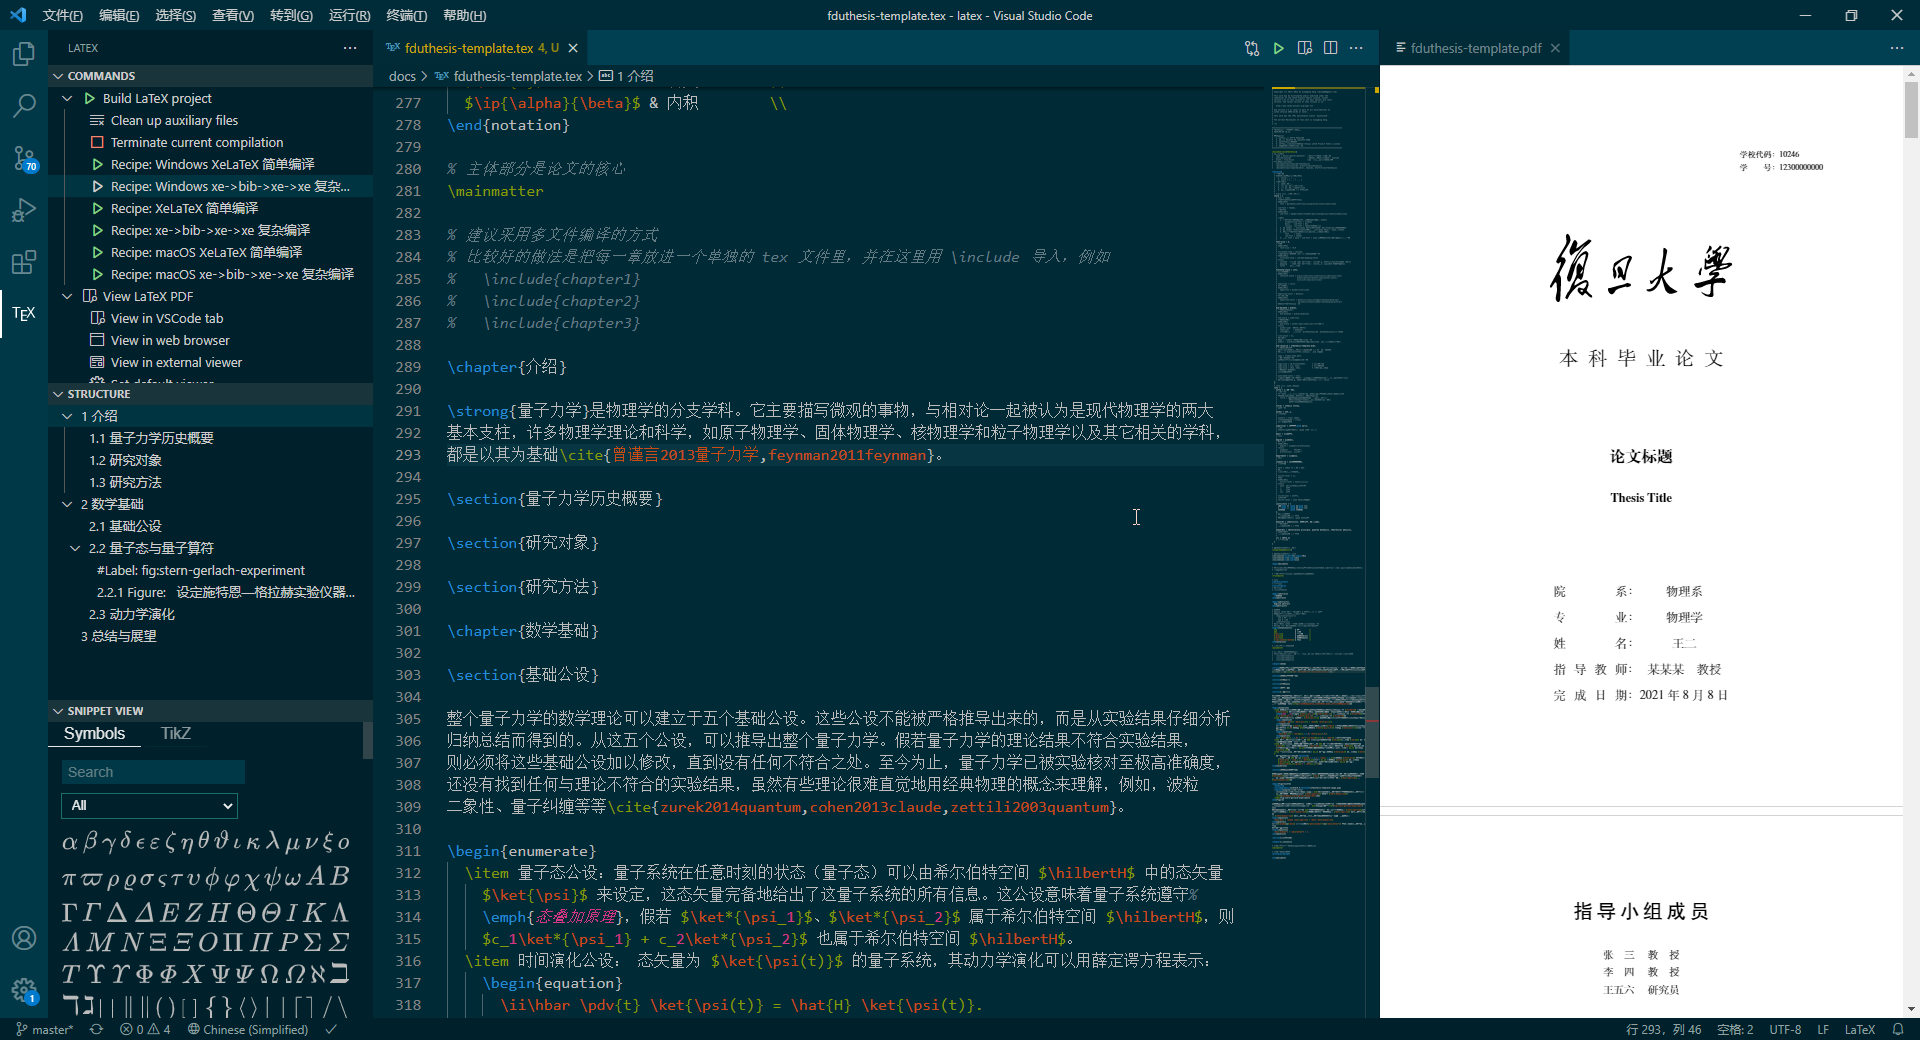
啊... 又要写毕业论文了... 担心 Overleaf 须要联网有一定风险, 还是打算 本地 TeX Live + Github 版本管理与备份.
安装
TeX Live 2021
用国内镜像下载, 速度快: 清华源 | 华为云源 | 阿里云源.
双击下载的 ISO, 打开 (不用管理员) install-tl-windows.bat, 会有 GUI 安装界面. 我直接便携安装在 D 盘了, 安装出来有 7 个多 G, 语言少选几个可以少安装一个 G, 不过也就一个 G, 干脆全装了.
好家伙装了半个多小时了, 怎么还没装完, 我这硬盘还是 SSD.
妈耶一看全是几 k 到几百 k 的小文件... 又让我想起了被 NPM 的依赖包支配的恐惧...
尼玛快 50 分钟了吧? 早知道直接上 Overleaf 了... 感觉现在 Overleaf 访问也挺稳定的.
终于装完了...
由于我选了便携安装, 所以为了识别出那几个指令, 要自己把安装路径的 bin D:\texlive\2021\bin\win32 加入系统环境变量的 Path 里.
VSCode 插件配置
安装 SumatraPDF 可以实时预览: 官网 | Github. 这是可选项, 但是确实方便. 由于只是给 LaTeX 用, 就下了个便携版, 下下来只有一个 exe, 直接扔 TeX Live 目录里得了.
在 VSCode 插件商店安装 LaTeX Workshop, 用来语法高亮, 自动补全, 编译什么的.
在 VSCode 按
F1, 输入setjson, 选择首选项: 打开设置 (json), 在最外层花括号内追加如下内容:上面这串设置是网上找的 (文章都是抄来抄去, 也不知道到底是谁整理的...), 不过看着很靠谱. 但也是自己改动了一些.1
2
3
4
5
6
7
8
9
10
11
12
13
14
15
16
17
18
19
20
21
22
23
24
25
26
27
28
29
30
31
32
33
34
35
36
37
38
39
40
41
42
43
44
45
46
47
48
49
50
51
52
53
54
55
56
57
58
59
60
61
62
63
64
65
66
67
68
69
70
71
72
73
74
75
76
77
78
79
80
81
82
83
84
85
86
87
88
89
90
91
92
93
94
95
96
97
98
99
100
101
102
103
104
105
106
107
108
109
110
111
112
113
114
115
116
117
118
119
120
121
122
123
124
125
126
127
128
129
130
131
132
133
134
135
136
137
138
139
140
141
142
143
144
145
146
147
148
149
150
151
152
153
154
155
156
157
158
159
160
161
162
163
164
165
166
167
168
169
170
171
172
173
174
175
176
177
178
179
180
181
182
183
184
185
186
187// ======================== LaTeX 设置 BEGIN ========================
// bibtex 格式
"latex-workshop.bibtex-format.tab": "tab",
// 自动编译,全部关闭,当且仅当你认为有需要的时候才会去做编译
"latex-workshop.latex.autoBuild.run": "never",
"latex-workshop.latex.autoBuild.cleanAndRetry.enabled": false,
// 设置 latex-workshop 的 PDF 预览程序,external 指的是外部程序
"latex-workshop.view.pdf.viewer": "tab",
"latex-workshop.view.pdf.ref.viewer": "external",
"latex-workshop.view.pdf.external.viewer.command": "D:\\texlive\\SumatraPDF-3.3.3-64.exe", // 注意修改路径
"latex-workshop.view.pdf.external.viewer.args": [
"%PDF%"
],
// 配置正向、反向搜索:.tex -> .pdf
"latex-workshop.view.pdf.external.synctex.command": "D:\\texlive\\SumatraPDF-3.3.3-64.exe", // 注意修改路径
"latex-workshop.view.pdf.external.synctex.args": [
// 正向搜索
"-forward-search",
"%TEX%",
"%LINE%",
"-reuse-instance",
// 反向搜索
"-inverse-search",
"\"C:\\Users\\xie\\AppData\\Local\\Programs\\Microsoft VS Code\\Code.exe\" \"C:\\Users\\xie\\AppData\\Local\\Programs\\Microsoft VS Code\\resources\\app\\out\\cli.js\" -gr %f:%l",
"%PDF%"
],
// 这是一些独立的编译选项,可以作为工具被编译方案调用
"latex-workshop.latex.tools": [{
// Windows 原生安装 TeX Live 2020 的编译选项
"name": "Windows XeLaTeX",
"command": "xelatex",
"args": [
"-synctex=1",
"-interaction=nonstopmode",
"-file-line-error",
"-pdf",
"%DOCFILE%"
]
},
{
// Windows BibTeX 编译
"name": "Windows BibTeX",
"command": "bibtex",
"args": [
"%DOCFILE%"
]
},
{
// Windows Biber 编译
"name": "Windows Biber",
"command": "biber",
"args": [
"%DOCFILE%"
]
},
{
// WSL XeLaTeX 编译一般的含有中文字符的文档
"name": "WSL XeLaTeX",
"command": "wsl",
"args": [
"/usr/local/texlive/2020/bin/x86_64-linux/xelatex",
"-synctex=1",
"-interaction=nonstopmode",
"-file-line-error",
"-pdf",
//"-output-directory=%OUTDIR%",
//"-aux-directory=%OUTDIR%",
"%DOCFILE%"
]
},
{
// WSL biber / bibtex 编译带有 citation 标记项目的文档
"name": "WSL Biber",
"command": "wsl",
"args": [
"/usr/local/texlive/2020/bin/x86_64-linux/biber",
"%DOCFILE%"
]
},
{
// macOS 或者 Linux 的简单编译
// 两种操作系统的操作方式相同
"name": "macOS / Linux XeLaTeX",
"command": "xelatex",
"args": [
"-synctex=1",
"-interaction=nonstopmode",
"-file-line-error",
"-pdf",
"%DOCFILE%"
]
},
{
// macOS 或者 Linux 的索引编译
// 两种操作系统的操作方式相同
"name": "macOS / Linux Biber",
"command": "biber",
"args": [
"%DOCFILE%"
]
}
],
// 这是一些编译方案,会出现在 GUI 菜单里
"latex-workshop.latex.recipes": [{
// 1.1 Windows 编译简单的小文档,这个选项不太常用,因为绝大多数文章都需要有参考文献索引
"name": "Windows XeLaTeX 简单编译",
"tools": [
"Windows XeLaTeX"
]
},
{
// 1.2 Windows 编译带有索引的论文,需要进行四次编译;-> 符号只是一种标记而已,没有程序上的意义
"name": "Windows xe->bib->xe->xe 复杂编译",
"tools": [
"Windows XeLaTeX",
"Windows BibTeX",
"Windows XeLaTeX",
"Windows XeLaTeX"
]
},
{
// 2.1 WSL 编译简单的小文档,这个选项不太常用,因为我绝大多数文章都需要有引用。
"name": "XeLaTeX 简单编译",
"tools": [
"WSL XeLaTeX"
]
},
{
// 2.2 带有 citation 索引的文档,需要进行四次编译;-> 符号只是一种标记而已,没有程序上的意义
"name": "xe->bib->xe->xe 复杂编译",
"tools": [
"WSL XeLaTeX",
"WSL Biber",
"WSL XeLaTeX",
"WSL XeLaTeX"
]
},
{
// 3.1 macOS 简单 小文档
"name": "macOS XeLaTeX 简单编译",
"tools": [
"macOS XeLaTeX"
]
},
{
// 3.2 macOS 四次编译
"name": "macOS xe->bib->xe->xe 复杂编译",
"tools": [
"macOS / Linux XeLaTeX",
"macOS / Linux Biber",
"macOS / Linux XeLaTeX",
"macOS / Linux XeLaTeX"
]
}
],
// 清空中间文件
"latex-workshop.latex.clean.fileTypes": [
"*.aux",
"*.bbl",
"*.blg",
"*.idx",
"*.ind",
"*.lof",
"*.lot",
"*.out",
"*.toc",
"*.acn",
"*.acr",
"*.alg",
"*.glg",
"*.glo",
"*.gls",
"*.ist",
"*.fls",
"*.log",
"*.fdb_latexmk",
"*.bcf",
"*.run.xml",
//"*.synctex.gz"
]
// ======================== LaTeX 设置 END ========================- 首先是网上找的原版有错别字, 有个
command打成了commmand... - 其次由于我用的是 BibTeX 而不是 Biber, 所以依葫芦画瓢加了个 Windows BibTeX 的配置, 复杂编译改成了 BibTeX (其他 Linux, Mac 的没改, 还是 Biber).
latex-workshop.view.pdf.viewer改成了tab, 在 VSCode 内部打开预览窗口. 原本是external.- Json 里面要注意必须修改的有两个, 一个是 VSCode 的路径要替换, 一个是 SumatraPDF 的路径.
- 首先是网上找的原版有错别字, 有个
搞腚!
 点上面那个绿色的播放键 ▷ 就会编译并更新预览. 当然你也可以把 VSCode 设置里的
 latex-workshop.latex.autoBuild.run改成onSave甚至onFileChange, 可以做到实时刷新. 但是 LaTeX 毕竟不是 Markdown, 编译还是挺慢的, 想想还是手动更新好了.
安装问题踩坑
VSCode 报错: Recipe terminated with fatal error: spawn xelatex ENOENT.
这是忘记把安装路径的 bin 加入 Path 了.
编译报错: Cannot find 'xxx.bcf'!
将默认文献工具改为 BibTeX, 于是找的不是 .bcf 而是 .bib 了.
搞论文
复旦毕业论文模板: 曾祥东大佬的模板 Github